

Why Your Water Heater Deserves Some Attention
Water heater maintenance is one of those tasks that most homeowners forget about - until they're stuck with cold showers and expensive repair bills. But here's the thing: a little preventive care goes a long way.
Quick Water Heater Maintenance Checklist:
- Flush the tank annually (every 6 months for hard water)
- Test the TPR valve once per year
- Check the anode rod every 3 years
- Set temperature to 120°F for safety and efficiency
- Insulate pipes and tank to reduce heat loss
Regular maintenance delivers real benefits for Charleston homeowners. You'll save money on energy bills - for every 10 degrees you lower the temperature, you can expect to save up to 5% in energy costs. Your water heater will last longer too, with proper care extending its lifespan significantly.
Safety matters most. A well-maintained water heater prevents dangerous pressure buildup and reduces the risk of leaks that can cause water damage to your home.
The best part? Most maintenance tasks are simple enough for any homeowner to handle. You don't need special skills - just a garden hose, basic tools, and about an hour once a year.

Your Essential Annual Water Heater Maintenance Checklist
Safety first! Before we jump into the hands-on water heater maintenance tasks, let's cover the basics that'll keep you safe and sound. Your water heater deals with electricity or gas plus scalding hot water - not exactly forgiving if something goes wrong.
Always turn off the power at the breaker for electric units, or shut off the gas supply valve for gas models. Turn off the cold water supply to your water heater too. Trust me, you don't want water flowing while you're working on it.
Grab some protective gear - safety goggles and work gloves are your friends here. For most tasks, you'll need a garden hose, a large bucket (5-gallon works great), a screwdriver, an adjustable wrench (especially a 1 1/16-inch socket for that stubborn anode rod), and some towels for inevitable spills. Keep replacement parts like a new anode rod or TPR valve handy if yours need swapping.
Step 1: Flush the Tank to Remove Sediment

Picture tiny rocks and sand slowly collecting at the bottom of your water heater tank - that's sediment buildup in action. This stuff happens naturally, especially here in Charleston where we deal with hard water. Over time, sediment makes your heater work harder, cranks up your energy bills, and creates those weird popping and banging noises that make you wonder if something's about to explode.
The good news? Flushing sediment is totally doable for most homeowners.
Start by connecting your garden hose to the drain valve at the bottom of your water heater. Run the other end to a floor drain, large bucket, or safely outside where hot water won't damage anything.
Open the TPR valve by lifting its lever - this lets air into the tank so water can actually flow out. Then slowly open the drain valve and watch the water flow. At first, it might look like chocolate milk, but keep going until it runs clear.
If water drains slowly or stops completely, try a "power flush" technique. Close the TPR valve, briefly open the cold water inlet for a few seconds to stir things up, then close it and reopen both valves. This churning action helps break up stubborn sediment clogs.
Once the water runs clear, close everything up and refill your tank. Open a hot water faucet somewhere in your house and let it run until you get steady flow - this bleeds out air pockets.
Flush annually for most homes, but if you have particularly hard water, every six months keeps things running smoothly.
Step 2: Inspect and Replace the Anode Rod

Meet your water heater's sacrificial hero - the anode rod. This magnesium, aluminum, or zinc rod literally sacrifices itself to protect your tank from rust and corrosion. It attracts all the nasty minerals and chemicals that would otherwise eat away at your tank's steel lining.
Locate the anode rod at the top of your water heater - it's usually under a plastic cap or near the hot water outlet. After draining a few gallons to reduce pressure, use that 1 1/16-inch socket to unscrew it. Fair warning: it might be tighter than a pickle jar, so don't be shy with the elbow grease.
Inspect what comes out. A healthy rod should be relatively thick and smooth. If you're looking at something that resembles a wire coat hanger covered in crusty buildup, or if it's less than half an inch thick, time for a replacement.
Installing the new rod is straightforward - wrap the threads with plumber's tape, screw it in snugly, refill your tank, and restore power. If you're working in a tight space, flexible or segmented anode rods make the job easier.
Check your anode rod annually, but plan on replacement every three to five years depending on your water quality.
For the complete step-by-step process, check out our detailed guide: More on Replacing Water Heater Anode Rod.
Step 3: Test the Temperature & Pressure (TPR) Valve

Your TPR valve is like a safety fuse that prevents dangerous pressure buildup and potential explosions. When temperature or pressure gets too high inside your tank, this little device automatically opens to release water and steam. It's not dramatic, but it's absolutely critical.
Testing is simple. Place a large bucket under the discharge pipe that runs down the side of your water heater. Gently lift the lever for a few seconds - you should hear air rushing and see a good burst of water hit that bucket.
Release the lever and it should snap back, stopping the water flow immediately. If no water comes out when you lift the lever, the valve is clogged or broken - that's a serious safety issue requiring immediate professional attention.
If the valve keeps dripping after you release it, you might have high water pressure in your home or need a thermal expansion tank. Either way, it's worth having a pro take a look.
Test annually to make sure this crucial safety device has your back.
Step 4: Adjust Temperature and Insulate for Efficiency
Here's where you can make a real dent in your energy bills. Set your water heater to 120°F - it's the sweet spot that provides plenty of hot water, prevents scalding, and saves up to 5% for every 10 degrees you lower the temperature.
For electric models, you'll find thermostats behind small panels on the tank sides. Turn off power first, then adjust both upper and lower thermostats to the same temperature. Gas models have a simple dial on the front of the gas control valve - just turn it to your desired setting.
Insulation is your friend. If your water heater tank feels warm to the touch, it's literally hemorrhaging heat and money. Adding insulation can reduce heat loss by up to 45 percent according to Swezey Fuel.
Wrap older tanks with an insulating blanket, but avoid covering warning labels, air openings, or safety devices like that TPR valve we just tested. Newer heaters often come well-insulated already.
Don't forget the pipes! Insulating the first six feet of hot and cold water pipes connected to your heater prevents heat loss and stops condensation. Those foam pipe sleeves slip right on and make a noticeable difference.
Gas, Electric, or Tankless? Tailoring Your Maintenance Routine
Not all water heaters are created equal, and that means your water heater maintenance routine needs to match your specific type. While the basics like flushing and safety checks apply across the board, each system has its own personality and needs.
| Maintenance Task | Gas Tank Heater | Electric Tank Heater | Tankless Water Heater |
|---|---|---|---|
| Flushing/Descaling | Annually | Annually | Annually (descaling) |
| Anode Rod Inspection | Annually | Annually | Not applicable |
| TPR Valve Test | Annually | Annually | Annually (if present) |
| Temperature Adjustment | Yes | Yes | Yes |
| Insulation Check | Yes | Yes | Not applicable |
| Pilot Light/Burner | Inspect/Relight | Not applicable | Not applicable |
| Heating Elements | Not applicable | Inspect | Not applicable |
| Vent Inspection | Annually | Not applicable | Annually |
| Inlet Filter Cleaning | Not applicable | Not applicable | Annually |
Gas & Electric Tank Heaters
The good news? Most of what we've covered so far applies to both gas and electric tank water heaters. Both need regular flushing to clear out sediment, anode rod checks to prevent tank corrosion, and TPR valve testing for safety.
But here's where they start to differ. Gas water heaters are like having a little furnace in your utility room, which means they need some extra attention. The pilot light can sometimes go out (usually at the most inconvenient times!). If you suddenly lose hot water, check if the pilot is lit. Relighting it typically involves turning the control knob to 'Pilot' and following your manufacturer's instructions - newer models make this pretty straightforward.
Gas units also need vent inspection since they produce combustion gases that must safely exit your home. Once a year, take a peek at the exhaust stack for rust, loose connections, or any obstructions. If you have a newer gas water heater (post-2003), it likely has a Flammable Vapor Ignition Resistant system with a flame arrestor plate - keep this clean of dust and lint buildup.
Don't forget about the thermocouple either. This little safety device shuts off gas flow if the pilot light goes out. If your pilot won't stay lit, the thermocouple might be the culprit.
Electric water heaters are generally simpler but have their own quirks. The heating elements do the heavy lifting, and if one fails, you'll get lukewarm water at best. When you're doing maintenance, always make sure the tank is completely full before restoring power - dry heating elements burn out fast and aren't cheap to replace.
Electric units also have thermostats tucked behind access panels and insulation, which makes temperature adjustments a bit more involved than gas models.
Tankless Water Heater Maintenance: A Different Approach
Tankless water heaters are the minimalists of the water heating world. No tank means no anode rod to worry about, and their potential 20-year lifespan makes them pretty attractive compared to traditional tanks that last 8-12 years.
The main event for tankless units is descaling - think of it as giving your unit a vinegar spa treatment. Mineral buildup in the heat exchanger is the enemy here, especially in areas with hard water.
The process involves connecting a small pump and circulating food-grade white vinegar through the system for about 45 minutes to an hour. The acid dissolves those stubborn calcium and lime deposits that reduce efficiency. After the vinegar treatment, you'll flush everything with clean water and clean the inlet filter that catches debris.
While this might sound complicated, it's actually pretty straightforward once you get the hang of it. That said, many Charleston homeowners prefer having a professional handle their annual tankless maintenance - there's no shame in that game!
The beauty of tankless systems is they're built to last with proper care. Regular descaling keeps them running efficiently and can help them reach that impressive 20-year mark.
For more insight into why these units are worth considering, check out the Benefits of a Tankless Water Heater and get specific guidance with our Tankless Water Heater Maintenance Tips.
When to Call a Professional: Warning Signs to Watch For
We love empowering Charleston homeowners to handle basic water heater maintenance themselves. There's something satisfying about flushing your own tank or checking that anode rod! But let's be honest - sometimes your water heater is trying to tell you something that requires professional expertise.
Think of it this way: you wouldn't ignore a check engine light in your car, and you shouldn't ignore warning signs from your water heater either. Safety comes first, and some issues are simply too complex or potentially dangerous for DIY fixes.
No hot water is often the first sign something's seriously wrong. Check the pilot light on gas units or flip the breaker on electric models. But if you've done the basics and you're still stuck with cold showers, the problem likely lies deeper - maybe a failed heating element, faulty thermostat, or internal damage that needs professional diagnosis.
Rusty or discolored water flowing from your hot water taps tells a story you don't want to hear. That brownish or reddish tinge usually means your tank is corroding from the inside. Your anode rod has given its all, and now the tank itself is under attack. This isn't something you can patch up with a weekend project.
A rotten egg smell from your hot water is more than just unpleasant - it signals bacterial growth inside your tank. While it might sound simple enough to fix, properly disinfecting a water heater requires specific techniques and safety precautions that professionals handle best.
Major leaks from the tank body are a clear sign your water heater's days are numbered. You might tighten a loose connection or replace a drain valve gasket. But when water seeps directly from the tank walls, that steel has corroded through or cracked. No amount of DIY spirit can fix that - it's replacement time.
Those loud rumbling, popping, or groaning noises that go beyond normal sediment sounds? Your water heater is working way too hard. Severe sediment buildup or a weakening tank creates these dramatic sound effects. While you might be tempted to ignore them, these noises often signal bigger problems brewing inside.
When your TPR valve constantly drips even after testing, don't just keep placing buckets underneath. This safety device is trying to tell you something important about pressure levels or thermal expansion in your system. The valve itself might need replacement, but figuring out why it's acting up requires professional expertise.
For gas water heaters, frequent pilot light outages point to issues with the thermocouple, gas control valve, or ventilation problems. These components involve gas safety - definitely professional territory.
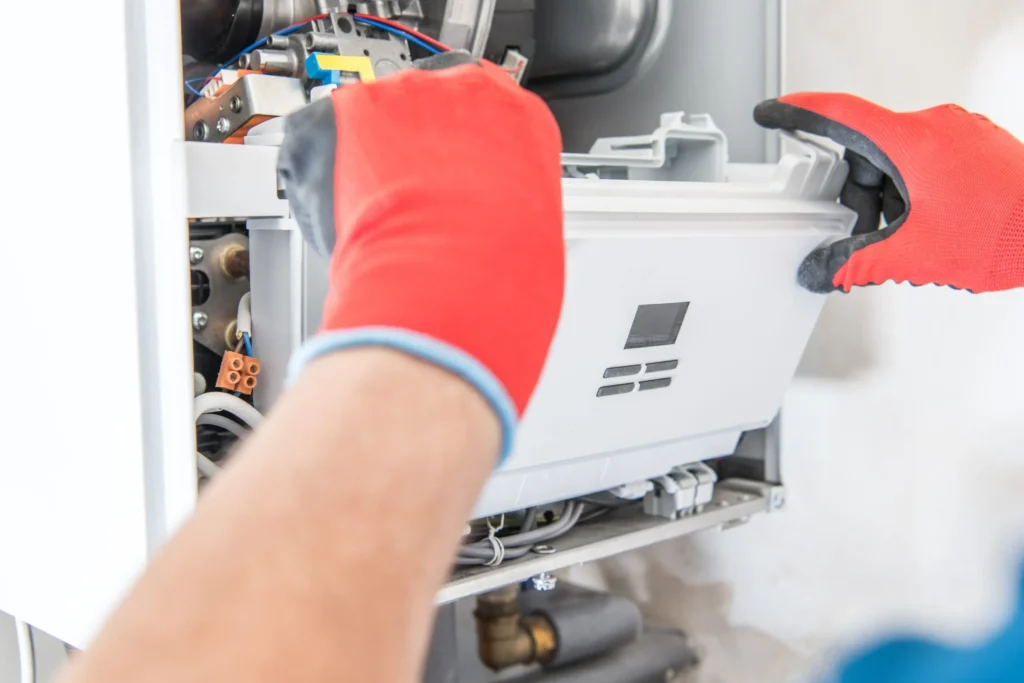
Our EPA-certified, licensed professionals at Holy City Heating & Air have over 20 years of industry expertise. We combine the resources of a growing company with the personal care of a local business, ensuring you receive the best service every time. We're here for all your water heater needs, from diagnosing tricky issues to complete replacements.
Learn more about the Professional Water Heater Repair Benefits and when it's time to Consider Water Heater Replacement.
Frequently Asked Questions about Water Heater Care
We hear the same concerns from Charleston homeowners all the time - you're not alone in wondering about water heater maintenance! Whether you're in downtown Charleston, out on Kiawah Island, or anywhere in between, these questions come up again and again.
How often should I perform water heater maintenance?
Here's the good news - you don't need to think about your water heater every month. Annual maintenance is the sweet spot for most traditional tank water heaters, whether they run on gas or electricity. This yearly routine should include flushing out sediment, testing that all-important TPR valve, and checking your anode rod.
But there's a catch if you live with hard water (and many of us in the Charleston area do). Those extra minerals in hard water create more sediment buildup, which means flushing every six months becomes your new best practice. Trust us - your water heater will thank you for the extra attention.
Tankless water heaters march to their own drum. They need annual descaling to keep those heat exchangers running smoothly. It's different from traditional tank flushing, but just as important for maintaining that endless hot water we all love.
What causes a water heater to leak from the bottom?
Nothing gets a homeowner's attention quite like water pooling around their water heater! The good news is that not all bottom leaks spell disaster.
Sometimes it's something simple - maybe the drain valve at the bottom got a little loose over time. A quick turn with a wrench might solve your problem. Or you might be seeing condensation, especially with gas water heaters when they first fire up or during humid Charleston summers. This "fake leak" usually dries up on its own.
The serious scenario is when water actually seeps from the tank itself. This typically means the steel tank has corroded through - often because an old anode rod stopped doing its protective job. Unfortunately, there's no fixing a cracked tank. When the tank goes, the whole unit needs replacing.
If you're not sure which situation you're dealing with, turn off the water supply and give us a call. It's better to catch a real leak early than to come home to a flooded utility room.
How does hard water affect my water heater?
Hard water is like that houseguest who seems harmless but slowly drives you crazy. Those dissolved minerals - mainly calcium and magnesium - don't cause immediate problems, but they're working against your water heater every single day.
When your water heater does its job and heats that hard water, the minerals fall out of solution and settle at the bottom like unwanted houseguests. This sediment layer creates a cascade of problems that get worse over time.
Your heating element or burner suddenly has to work through this mineral barrier, forcing your water heater to work harder and drive up your energy bills. You'll start hearing those telltale popping and banging sounds as trapped water boils beneath the sediment layer.
The real kicker is how hard water shortens your water heater's lifespan. That constant overheating at the tank bottom accelerates corrosion and can lead to premature failure. In severe cases, sediment can even clog your drain valve or reduce water flow throughout your home.
If hard water is part of your daily reality in Charleston, more frequent flushing every six months becomes essential rather than optional. A water softener can help reduce the problem, but regular maintenance is still your water heater's best defense against those mineral deposits.
Conclusion: Keep Your Home Comfortable and Efficient
Taking care of your water heater maintenance doesn't have to be complicated or overwhelming. The simple annual tasks we've covered - flushing out sediment, checking that anode rod, testing your safety valve, and adjusting temperature settings - can make a huge difference in your daily comfort and monthly bills.
The benefits speak for themselves. You'll enjoy consistent hot showers, lower energy costs, and peace of mind knowing your system is running safely. Plus, you'll likely get several extra years out of your water heater, which is always a nice bonus for your wallet.
We believe in empowering homeowners to handle basic maintenance confidently. Most of these tasks require nothing more than a garden hose, basic tools, and about an hour of your time once a year. You've got this!
That said, know when to call in the pros. If you encounter rusty water, strange smells, major leaks, or anything that makes you uncomfortable working around gas or electricity, don't hesitate to reach out. Some jobs are simply better left to experienced professionals who can diagnose issues safely and effectively.
At Holy City Heating & Air LLC, we're your Charleston neighbors. Since 2015, our family-owned company has been helping local families keep their homes comfortable year-round. With over 20 years of industry expertise and EPA-certified, licensed professionals, we're here when you need us most - whether that's for routine maintenance, emergency repairs, or complete system replacements.
We serve the entire Charleston area with pride, from downtown Charleston to Kiawah Island, Johns Island, Mt Pleasant, North Charleston, Daniel Island, and everywhere in between. Our team combines the resources and reliability of a growing company with the personal touch you'd expect from your local neighbors.
For all your professional plumbing and water heater needs in Charleston, SC, contact our team today!


Recent posts
In Depth Guide to Geothermal Ground Loops Lifespan
July 7, 2026

A Comprehensive Guide to How a Maintenance Plan Extends Equipment Life
July 6, 2026

The Ultimate Guide to Geothermal Pros and Cons for Charleston Area Homes
July 3, 2026


